A Landscape Painters Guide to Vignetting in Paintings- Easel Talk 37
I often joke on the channel that I’m a card-carrying member of Vignetteers Anonymous. I got a problem. I got a real bad problem. I love to vignette. I think it’s so powerful. And this talk probably won’t be that long because it’s just one aspect of painting. But it’s incredibly vital, especially to what I do.
I rarely pass up a chance to apply some sort of vignette to what I do, and that includes the reference photos and the paintings themselves.
What Is Vignetting?
There are a couple different types. Back in the day, in illustration, one sort of vignette is the very clever use of not having an actual rectangle that the image is constrained in. The artist would artfully just leave out bits of the edges. That’s the toughest form of vignetting to do.
There’s also the black vignette. That’s typically what I’m doing. When I’m talking about vignetting, it’s a dark vignette. Once in a blue moon, maybe I could utilize the light vignette, where the edges are light and you’re not seeing a defined edge of the image.
In a sense, it’s kind of like that illustrator technique except when you’re an illustrator doing pen and ink, you’ve got to work all that out and it’s got to look good. It’s tough. Very tough.
Fortunately, we’re not too worried about that with paintings because paintings are always constrained in a rectangle. Or a circle. Or I guess Treklle panels. They sell you any kind of weird shape you might like. Some painters like to paint on weird shapes. For the most part, I’m talking about rectangles and we have to deal with the rectangle.
The rectangle is in a sense a bit of a tyranny. It’s something that is a bit inescapable. There’s a lot of things you can do to ameliorate the strong influence of the rectangle. I think that’s one reason why a lot of painters like gold leaf frames, it gives you a nice softened transition from the picture plane to the wall behind.
The photographic definition: vignetting is where the image in the frame is shaded at some or all of the corners.
Why Vignetting Works: Keep Them Inside the Picture Plane
What I like about vignetting the corners and sides of my painting is that it keeps the viewer inside the picture plane. That’s almost the whole talk.
I’m always saying in my painting sessions: the sides of your paintings, the corners, that’s not the place to have some bright detail or whatever. Or bright contrasty bit. Because anything that’s bright or contrasty in your painting is going to direct the attention of the viewer. And if you’re putting attention in a corner, that’s not where you want it.
You want the attention where your focal point is. Usually it would be a tree, offset against the sky in the landscape. It could be a lot of different things. But it would be somewhere in the middle-ish part of the painting, not off to the sides or the bottom. That’s like a recipe for disaster.
The vignette idea goes even further in that, not only are you not putting something light or contrasty in those areas, but you’re maybe subtly or not quite so subtly darkening the corners. And the reason I like to do this is it’s just not a place I want the viewer to hang out. I want them to enter the painting and move around in an appropriate manner. And that’s not hanging out in the corners smoking cigarettes.
Only the bad kids hang out in the corners of paintings. Darn kids.
Key Benefits
Keeps people from hanging out in the corners. Directs the eye to the focus of attention. Adds a sense of mystery. The vignetting always does that. It’s a subtle sense of focus.
Most of your graphics programs will have a vignette filter or slider. One of my favorite ways to apply vignettes is to really zoom out on the image and get a really fat airbrush set to a very light opacity. And that’s just plain black, by the way. I don’t recommend messing with colors when you’re doing this kind of thing.
Create a new layer. Just about every program will support that. And I just kind of waft it in.
Advanced Techniques
If you’re working in Photoshop or similar programs, there are several approaches:
Airbrush on a layer: Very light opacity, very soft touch. And even then I’ll turn down the opacity of that layer.
Merge modes: There is a particular mode called overlay. When you switch to that mode it darkens things but not in a blanket sort of way. It has a way of kind of darkening the darks and subtly leaving the lighter bits alone. It’s very powerful and I use that technique all the time.
Apply as a slider: You can apply a vignette as just a slider operation. Even on your phone there may be something like that.
Tying Shapes Together
I often apply this airbrush technique to larger masses, especially dark areas, to tie shapes together. Let’s say you’ve got some grass, trees, and bushes. Some of the bushes seem kind of bright and it’s maybe down in that corner area. What you can do is have a layer above and very gently apply darkness, black.
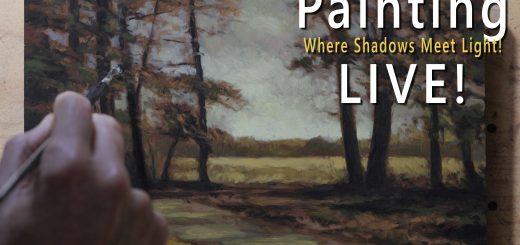
All your dark shapes in your painting are extremely critical. When you’re looking at my paintings in the background here, predominantly what you’re seeing is the dark shapes offset against the light. These dark shapes need to be tied together. You don’t want to have like a spotty kind of thing going. Especially in the corners, especially in the sides. You don’t want it.
A staccato sort of pattern of lights and darks is going to be the opposite of mystery in your painting. It’s going to be discordant. It’s not going to feel cohesive. You try and find a way to connect your darks together.
A Word of Caution: The Gothic Trap
Watch out for the gothic trap. If you get too carried away with the vignetting you run the risk of the picture coming off overly gothic.
I like dark things. I like my art fairly dark and mysterious and poetic as well. But you don’t want to overdo it. You don’t want to cross that line. Be careful with the vignetting.
That’s one thing I touched on earlier: don’t get too dark in those corners. Just a little dark. That’s why it’s good to work on layers so you can back off. Maybe go make a cup of tea and come back and appraise it again.
Because it’s a technique where a little goes a long way. A little is very powerful. And that’s really where you want to be. That’s the sweet spot. If it gets super overt, super dark, you get that pinhole effect. And that might be very effective. Some painters like to paint extremely dark and moody. But be intentional about it.
The Sweet Spot
We don’t have a lot more to say about vignetting. It’s a very limited topic. But although it’s pretty simple to understand, it’s incredibly powerful. And it’s just one of the things that can help up your game as a painter.
Even used very subtly. Like I said, avoid the gothic trap. But certainly use it. Keep people out of those corners. And always be thinking about where you’re going to direct the eye of the viewer. Think about the focal point. And everything in the painting should serve that.
Check out the book, 13 Years of Accumulated Painting Knowledge: How to Work in a Toneless Way. All in one book. And I will send it to you anywhere on the planet for $65 US. International shipping is included.
We’ve been shipping well over 200 books all over the world. I’m always gratified. I’ll find a way to get it to you.
Also check out my new channel, Michael Francis McCarthy on YouTube (@mfrancismcarthy), and the new website at mfrancismccarthy.art. Everything I do is on that site. Eventually, the landscape painter site will be integrated into it. For now, if you keep that tab open, you can see what I’m doing without having to bounce around.
Take care of yourself, your family, all your loved ones. Stay out of trouble. Fight the power.
Mike New Site | The Book | Gallery | YouTube | Members Area | My Music